Tutorial Guide: How to Use the Shopy Bulk Image Upload Guide Effectively
The Shopy Bulk Image Upload is a powerful Shopify Plus app that allows merchants to quickly and efficiently upload multiple product images in one go. By matching images with products via SKUs/Barcode, Title & Metafield, this app simplifies catalog management, saves time, and ensures consistent product presentation across the store.
With just a few steps, you can upload hundreds of images, preview matches, and confirm changes — all from one dashboard.
Step 1: Open the App Dashboard
1. From your Shopify Admin, go to Apps → Shopy Bulk Image Upload.
Or
Navigate to the Shopify Admin Panel for the test store: https://admin.shopify.com/store/shopy-geo-checkout/
Open the Shopy Bulk Image Upload app from the installed apps list.
Or use this direct link:
https://admin.shopify.com/store/shopy-geo/apps/shopy-bulk-image-upload
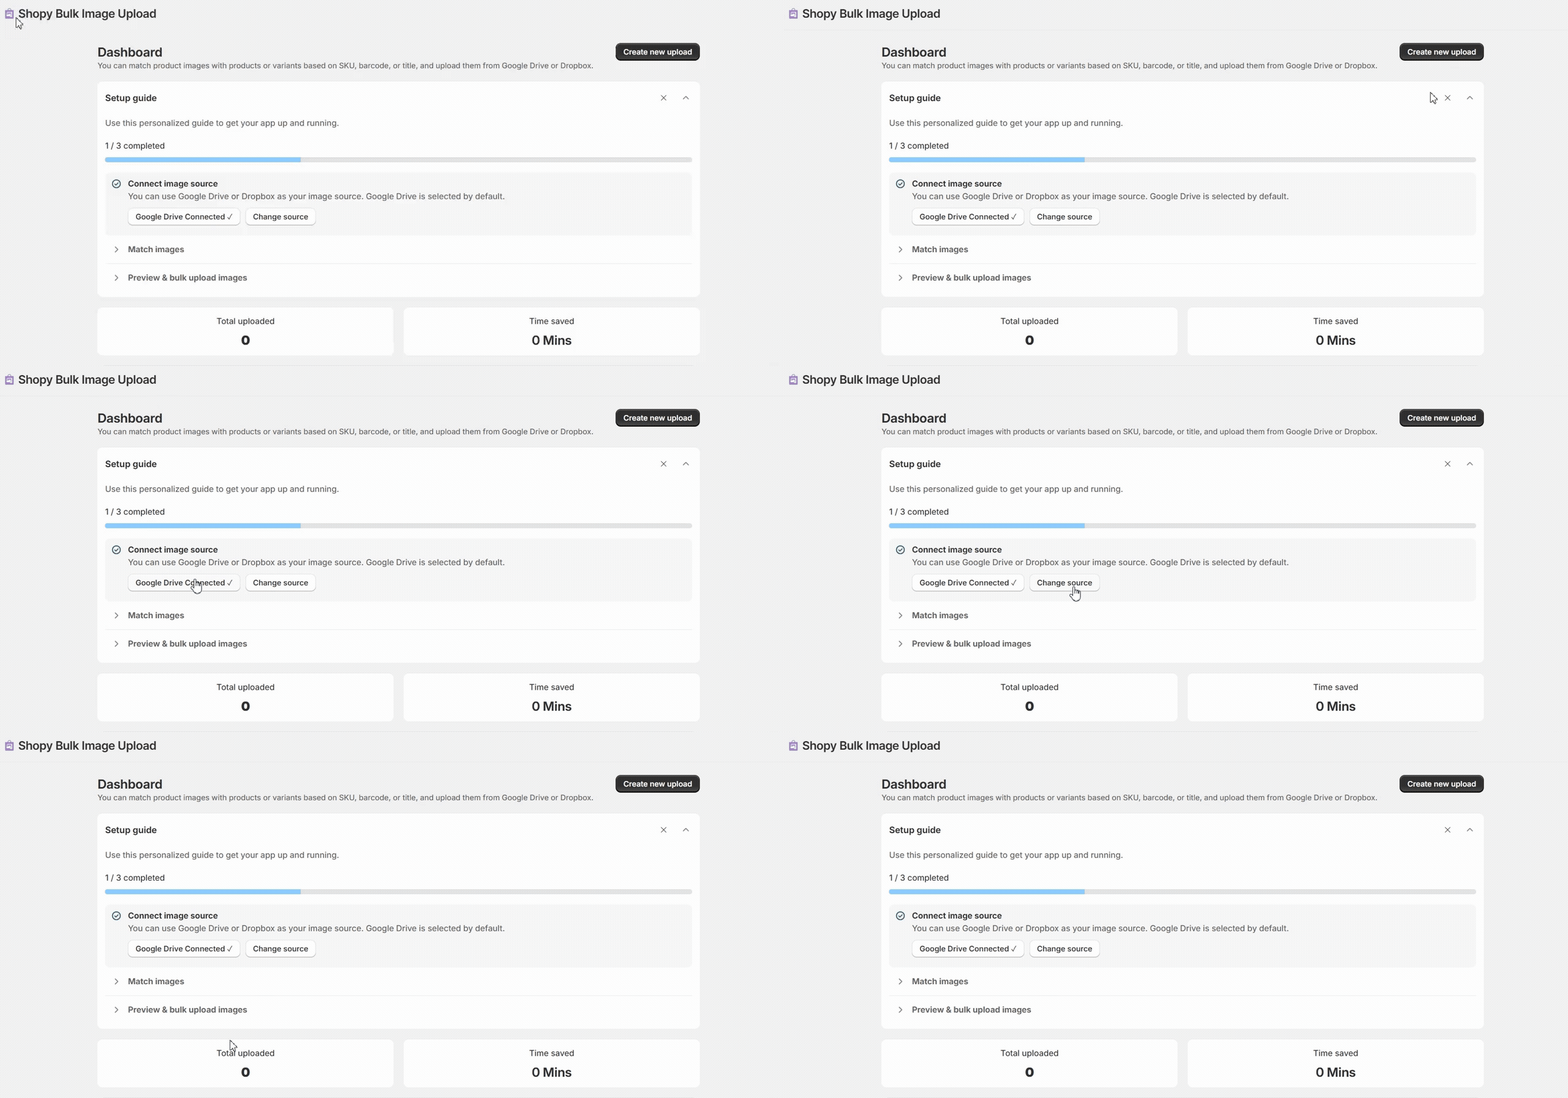
2. You’ll land on the Dashboard.
Here, you’ll see a Setup Guide with 3 steps:
– Connect image source
– Match images
– Preview & bulk upload
Step 2: Connect Image Source
1. In the Setup Guide, click Connect image source.
2. Choose Google Drive or Dropbox (Google Drive is set by default).
3. Once connected, the status will show Google Drive Connected.
4. You can click Change source if you want to switch providers.
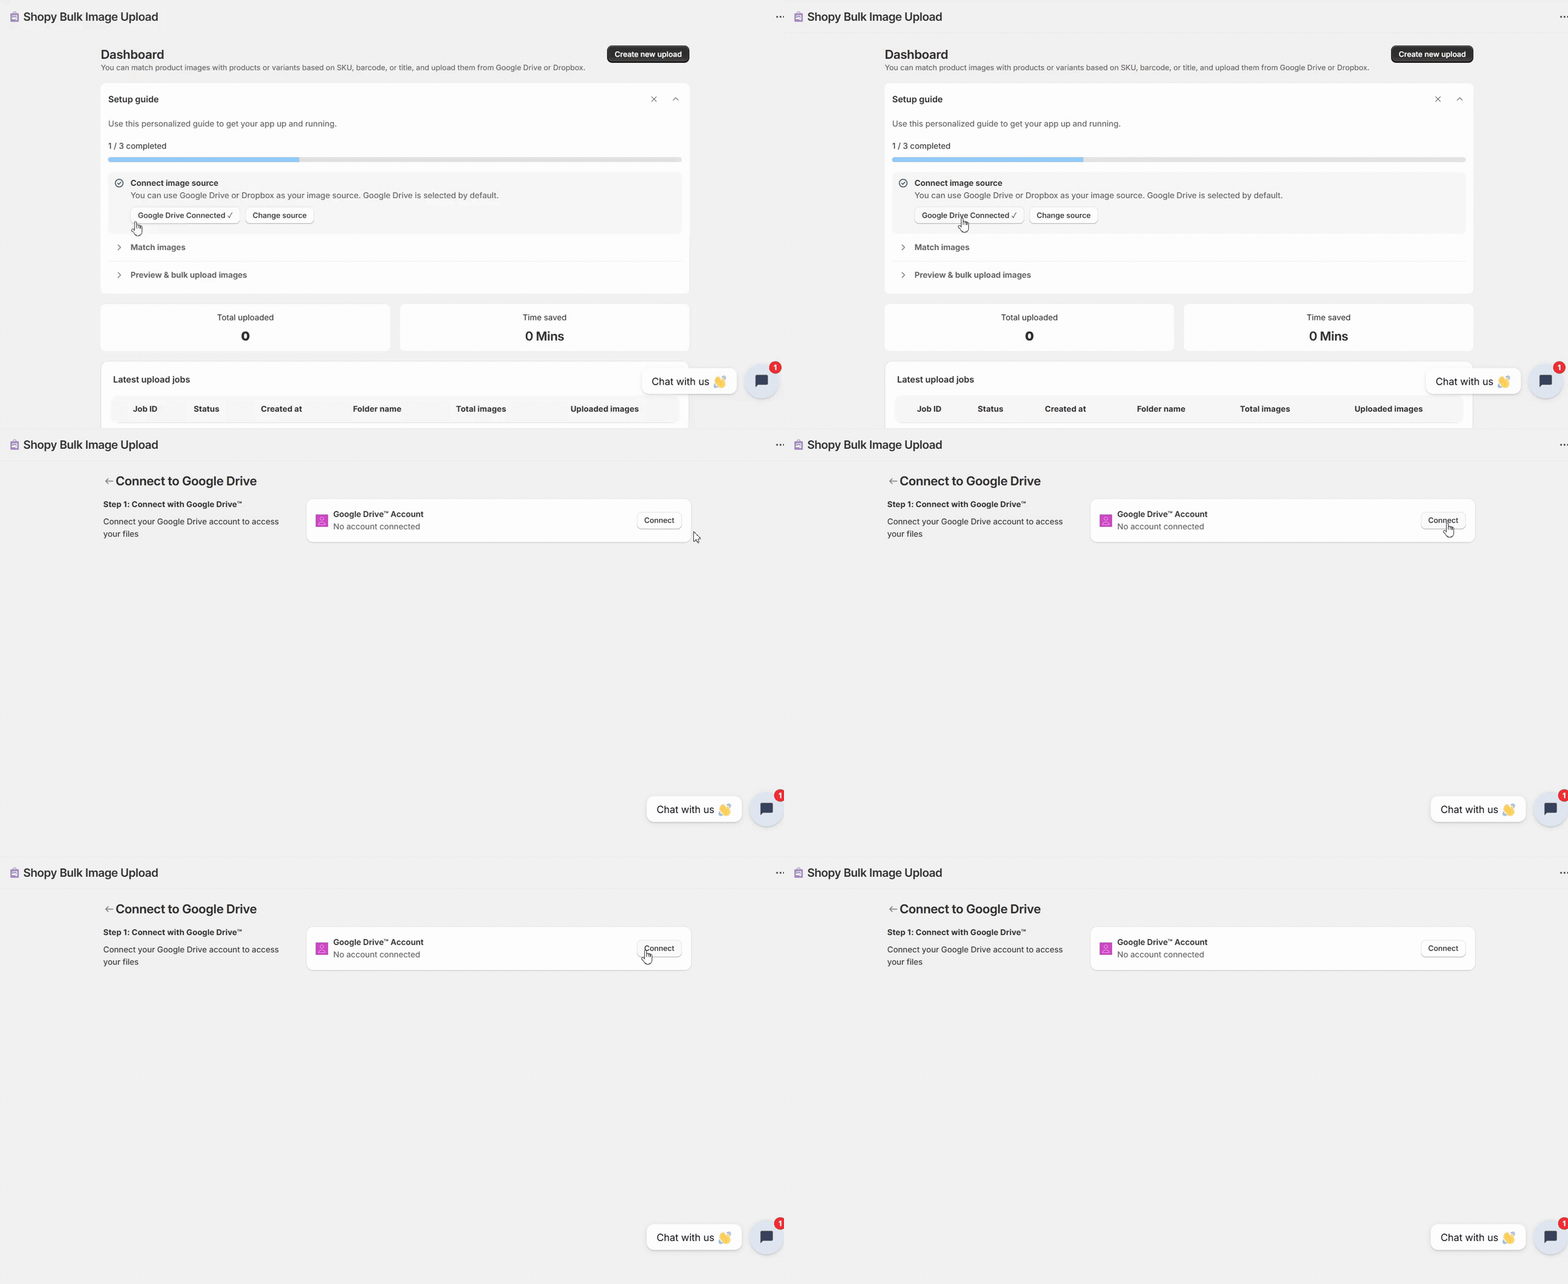
Step 3: Connect Google Drive Account
1. Under the Google Drive Account, you’ll see the message: No account connected.
2. Click the Connect button on the right.
3. A Google login pop-up will appear.
4. Choose the Google account you want to connect.
5. Allow the required permissions so the app can access image files.
6. Once connected, the status will change from:
❌ No account connected → ✅ Google Drive Connected.
7. This confirms that your Google Drive is now linked to the app.
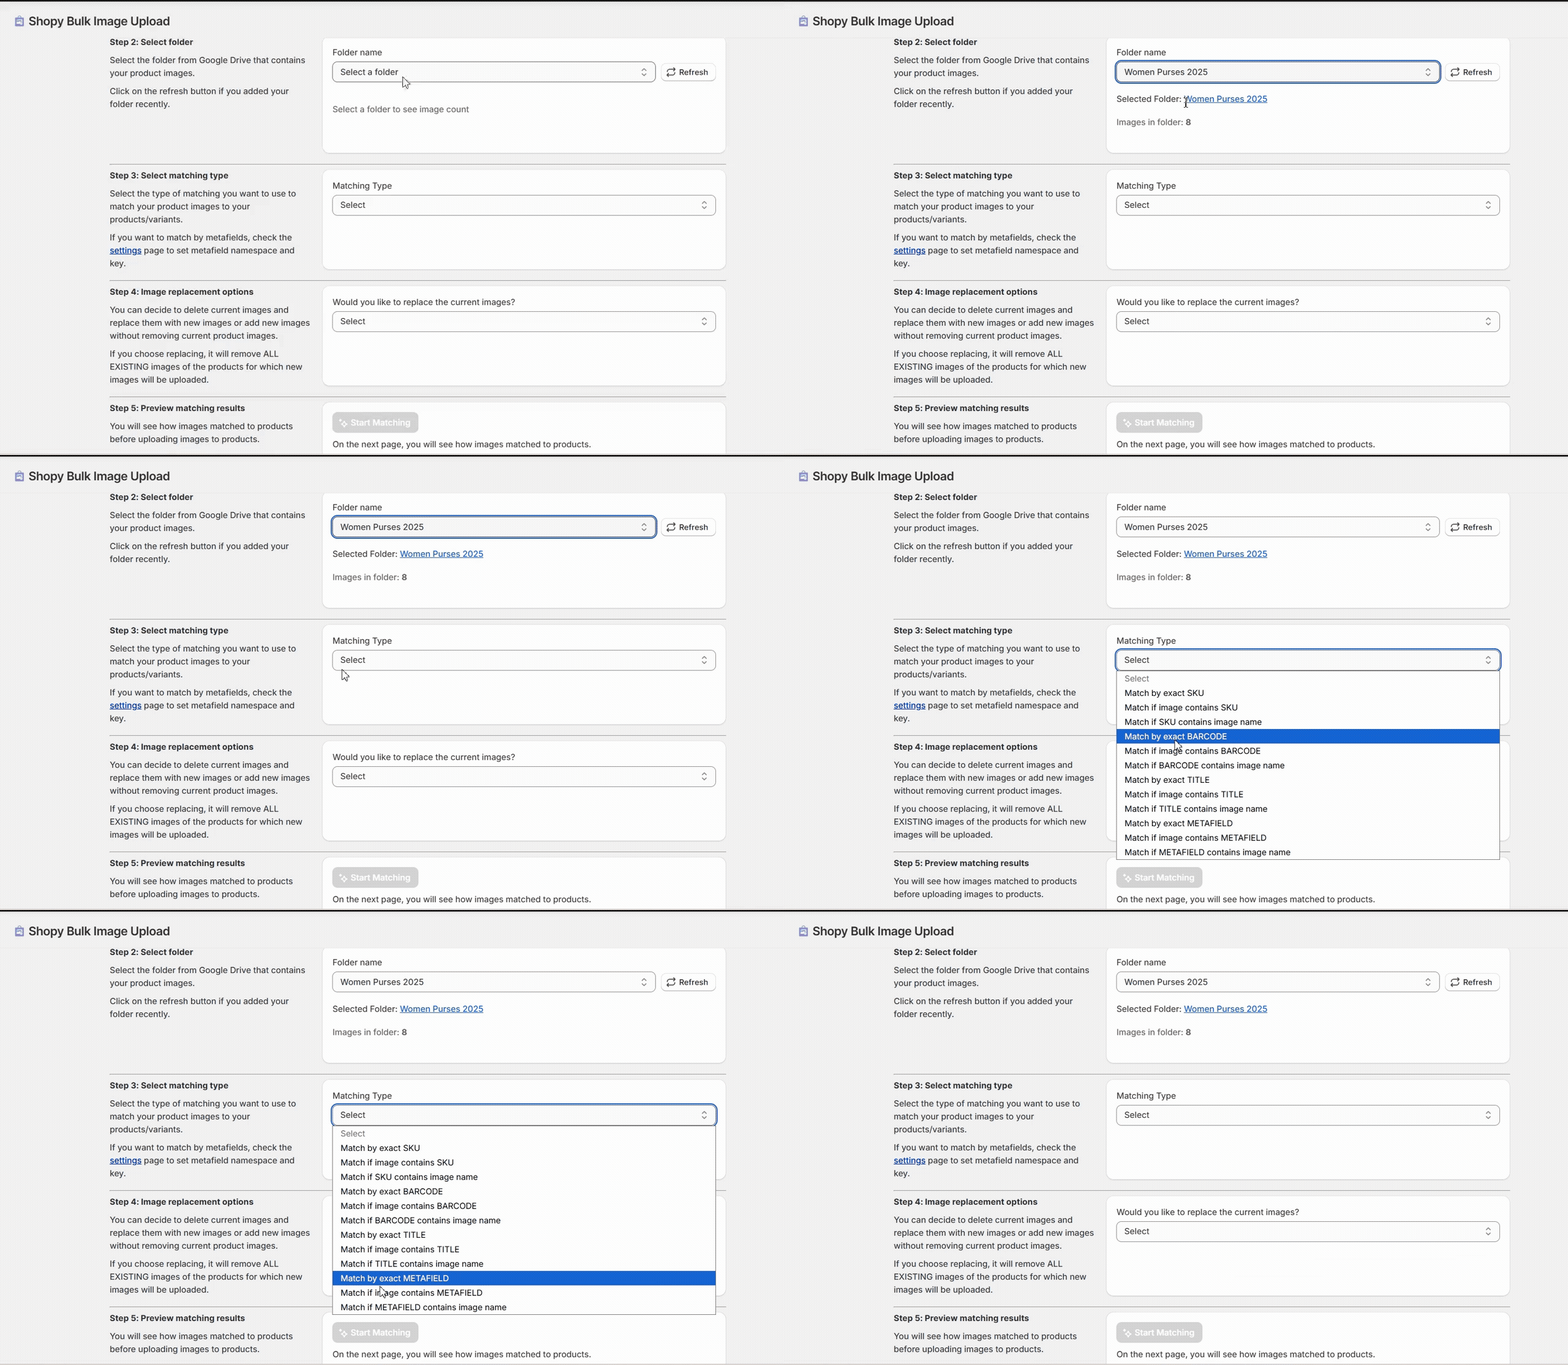
8. You can now select image folders from Google Drive for bulk uploads.
Step 4. Match Images
1. Expand the Match Images step.
2. The app will automatically try to match images with products based on:
-
- SKU
- Barcode
- Product Title
- SKU
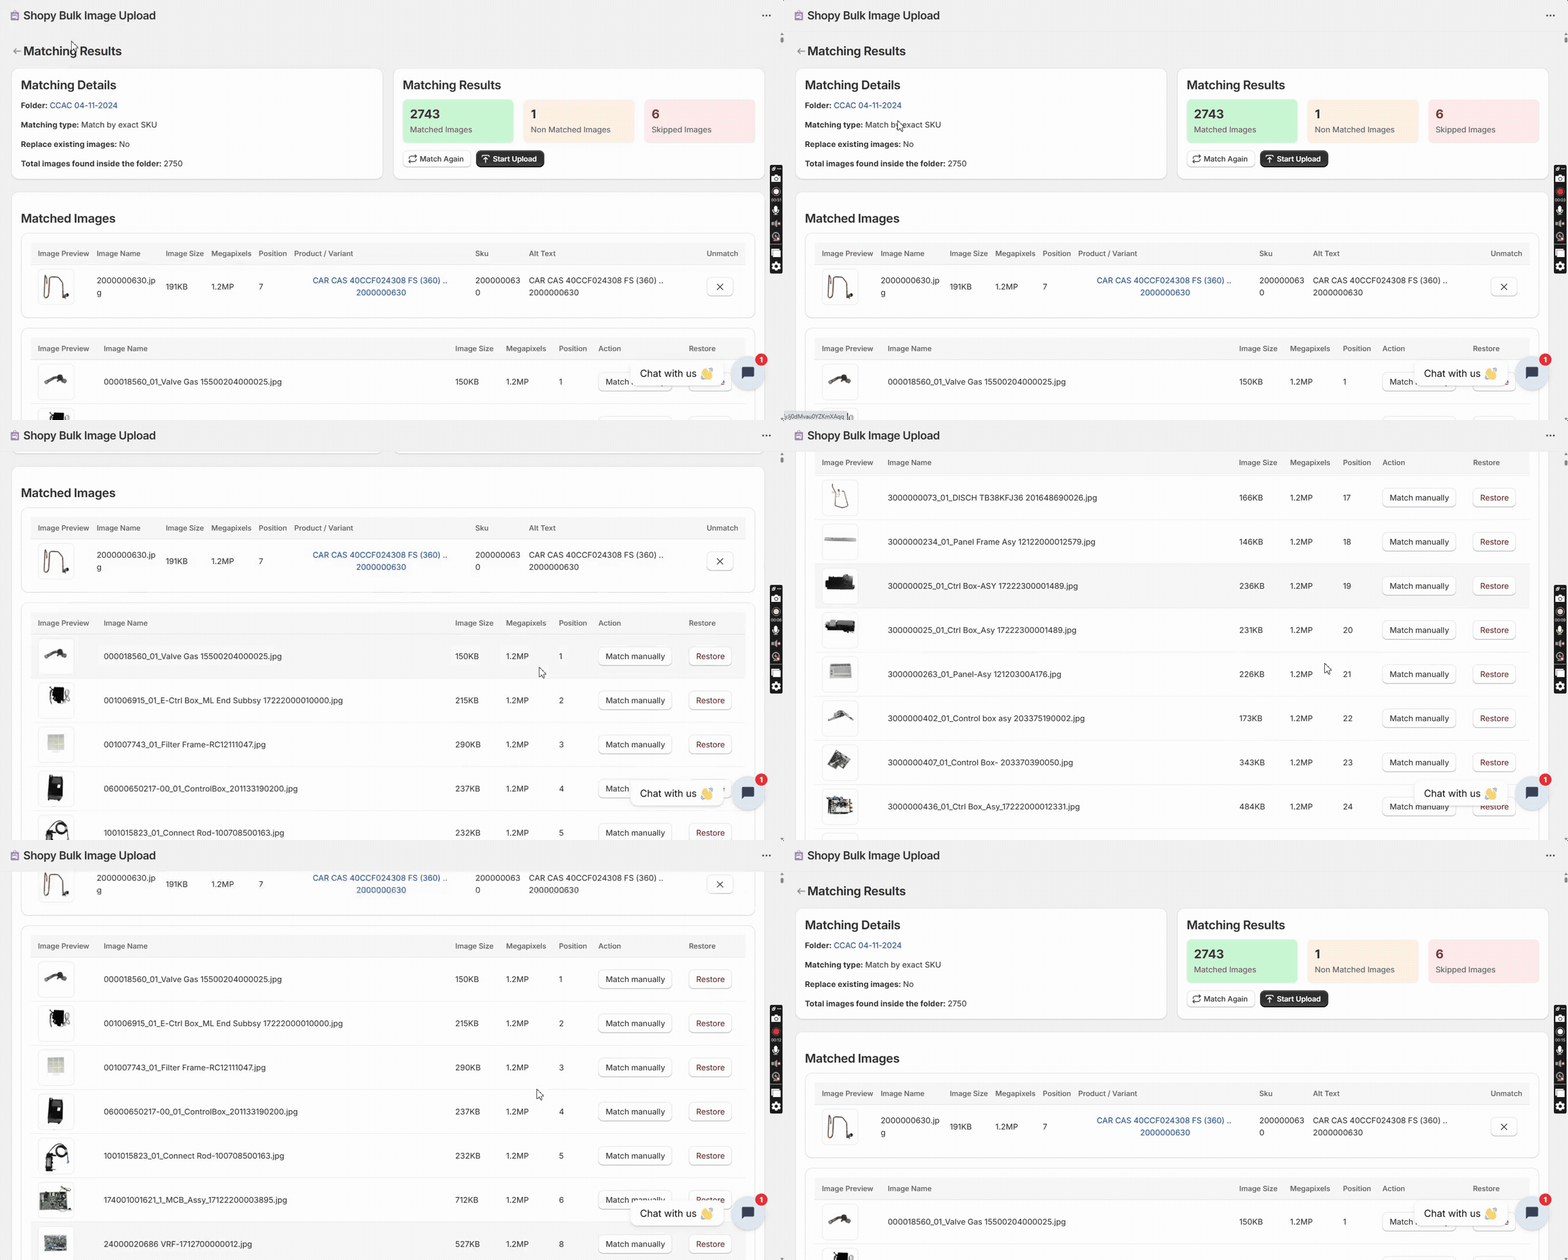
3. Review these matches carefully.
4. If needed, adjust mismatched images manually.
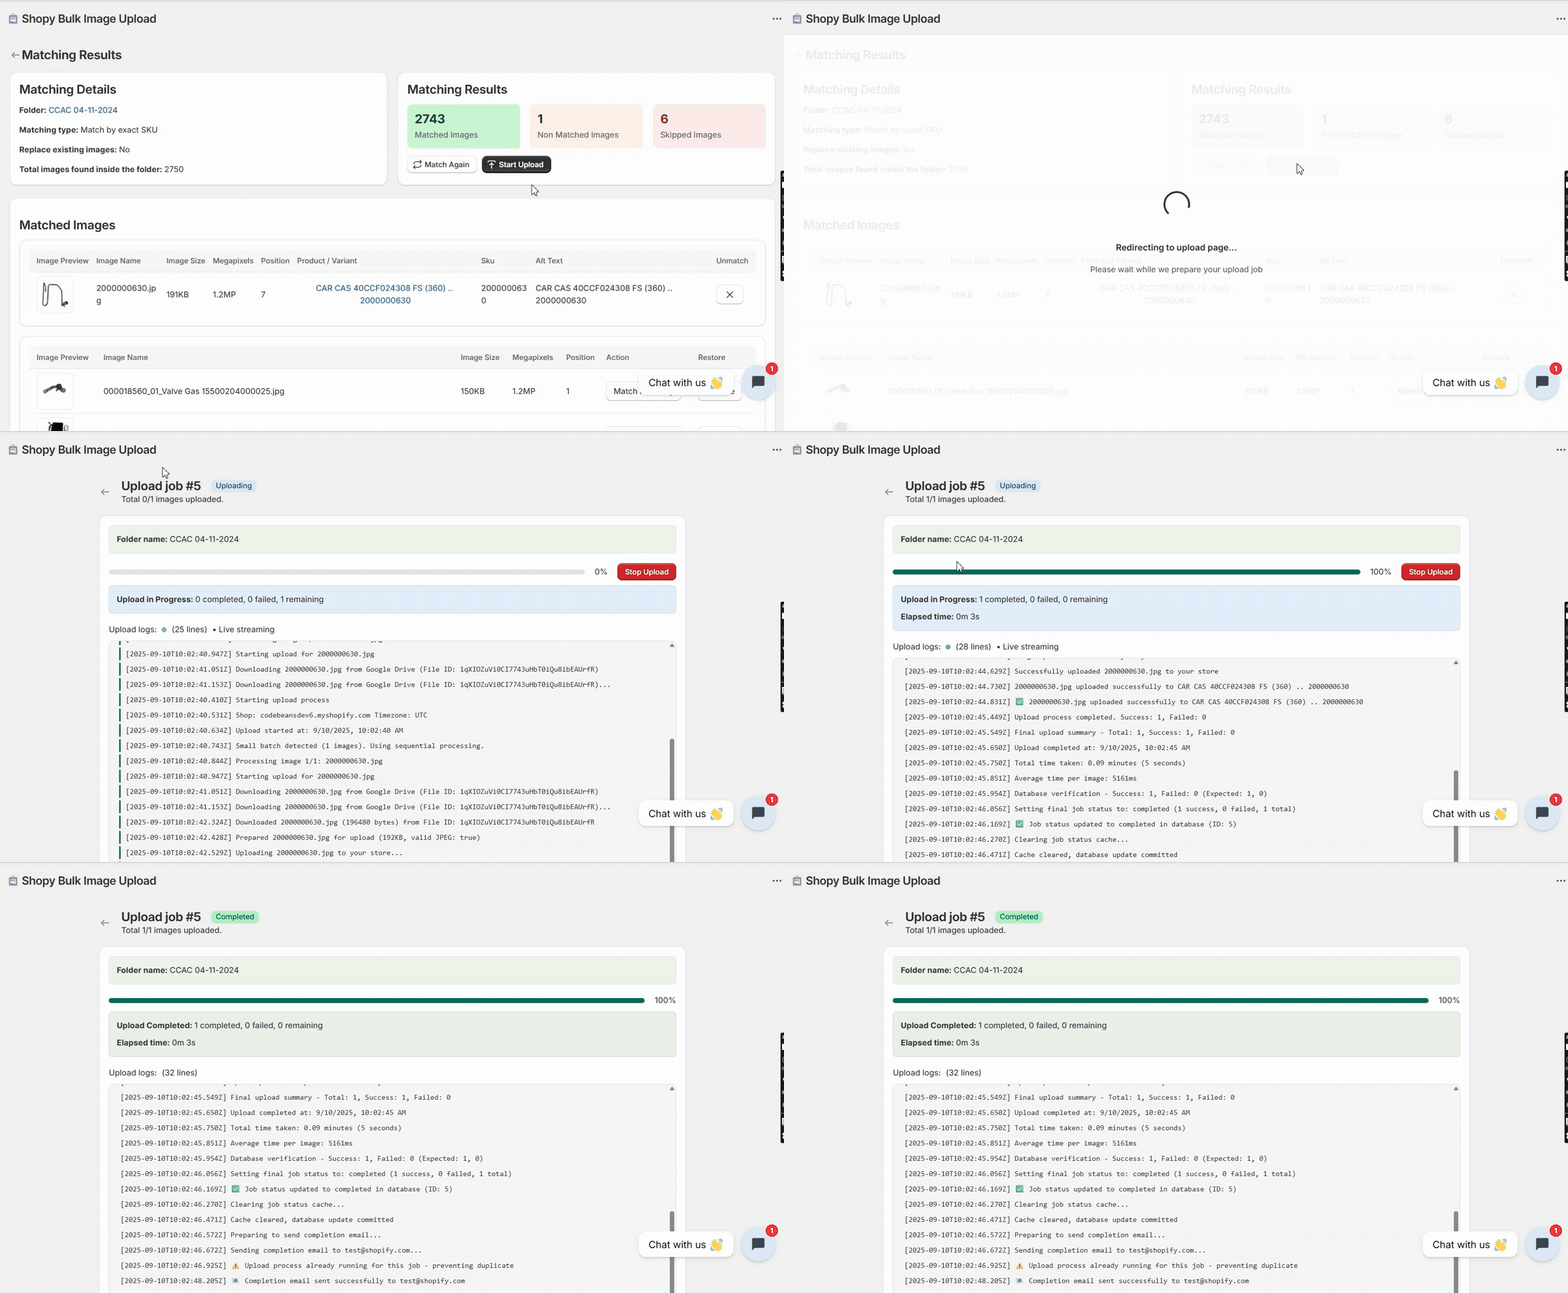
Step 5. Preview & Bulk Upload Images
1. Expand the Preview & Bulk Upload Images step.
2. Review the final preview of product-image pairs.
3. Click Create new upload (top-right corner).
4. The bulk upload process begins — progress and details are shown on screen.
Step 6. Track Upload Jobs
1. Scroll down to the Latest upload jobs section.
2. Here, you can monitor job details such as:
-
- Job ID
- Status (In Progress / Completed)
- Created At (timestamp)
- Folder Name
- Total Images
- Uploaded Images
- Job ID
3. This helps you track progress and verify successful uploads.
Step 7: Verify on Storefront
1. Open your store’s front-end.
2. Navigate to a few product pages included in the upload.
3. Confirm that:
-
- Images appear correctly.
- No mismatches occurred.
- All products display updated galleries.
- Images appear correctly.
Step 8. Done!
You’ve successfully used the Shopy Bulk Image Upload app — from connecting a source to uploading and verifying product images.

